|
Blend Mode Nodes |
- Where to find it:
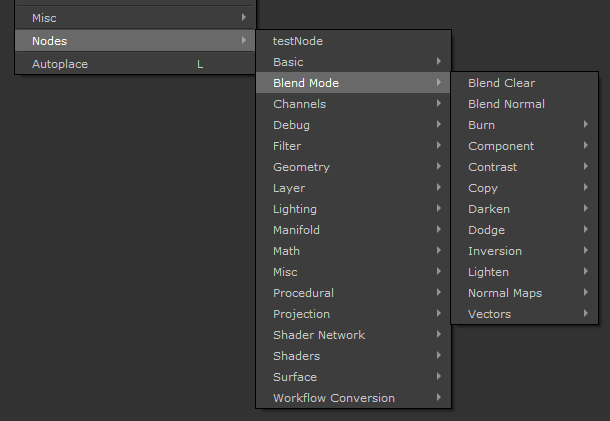
 NodeGraph / Right Mouse Click / Nodes / Blend Mode
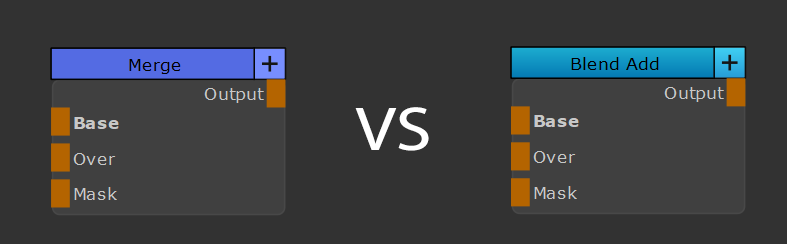
The default Mari way to layer nodes involves using a "Merge" Nodes.
"Merge" Nodes allow control over a lot over a lot of different effect such as
- Opacity & Mask
- Blend Mode
- Color Channel Isolation
- Advanced Blend Modes ("Blend if")
- etc
While powerful, these features come at significant computational expense, while 9 out of 10 times all the user does is choose
a Blend Mode and set an opacity. As users add more and more "Merge" nodes to build their nodegraph, these computational expenses
start adding up and having a noticeable performance impact (e.g. longer "spinning wheel" times).
Extension Pack adds a full LIbrary of so called "Blend Mode Nodes". These nodes have a very basic feature set:
- A fixed blend mode with identical math to Mari's and Extension Pack's Blend Modes available in the "Merge" Node
- Ability to mask and set Opacity
An Extension Pack "Blend Mode Node" is ~8x more efficient in computation time than a comparable merge node.
|
|
Mari's internal shader cache system does a good job of caching duplicate merge nodes, so the more merge nodes you use the more the performance impact curves flattens. |
In addition to the Blend Mode Nodes, several convenience tools are available to handle and work with them
|
Accessing Blend Mode Nodes |
All Blend Mode Nodes are prefixed with "Blend ", followed by the Blend Mode Name
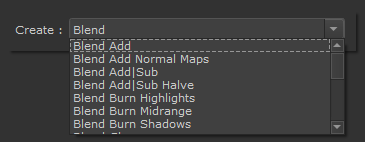
They can also be found in the Right Mouse Click / Nodes Menu under a Submenu called "Blend Mode"
|
Node Overview |
Blend Mode Nodes mimic the appearance of Mari's Merge Node, with a different color scheme
|
Node Ports |
- Base
As with Merge Nodes, the Base Port is the Background Layer
- Over
As with Merge Nodes, the Over Port is the Foreground Layer
- Mask
The Mask defines the Blend between the Base and Over.
|
Node Properties |
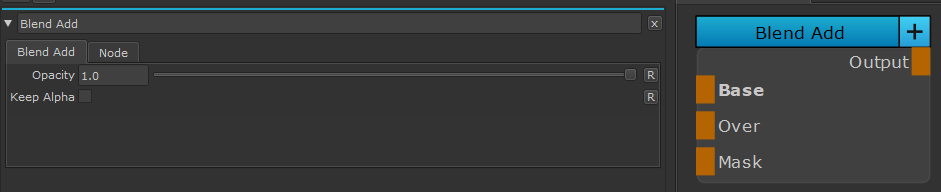
- Opacity
Defines the Opacity of the Layer mapped to the Over Port, over the Base Layer.
If Mask is attached to the Node, the controls the intensity of the Mask.
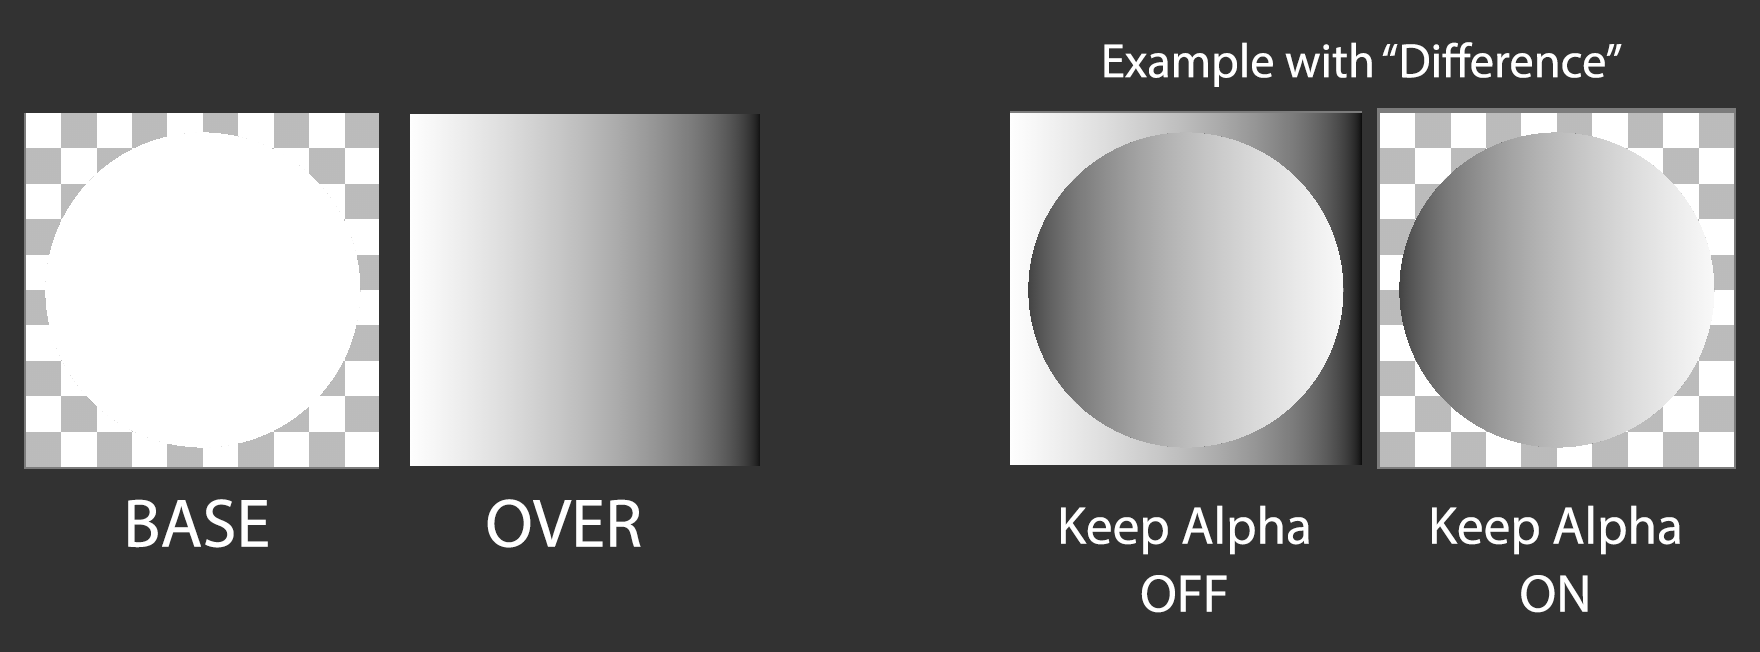
- Keep Alpha
The "Keep Alpha" checkbox option is not available on all "Blend Mode Nodes".
It's function is to mimic the "Merge NoAlpha" Node, when ticked.
"Merge NoAlpha" Nodes also only work with limited Blend Modes.

Example of Keep Alpha Off and On
|
Available Blend Mode Nodes |
- Blend Normal
- Blend Clear
- Contrast/Blend Overlay
- Contrast/Blend Sponge Desaturate
- Contrast/Blend Decontrast
- Contrast/Blend Add|Sub Halve
- Contrast/Blend Hard Light
- Contrast/Blend Linear Light
- Contrast/Blend Add|Sub
- Contrast/Blend Hard Mix
- Contrast/Blend Pin Light
- Contrast/Blend Vivid Light
- Contrast/Blend Contrast
- Contrast/Blend Soft Light
- Normal Maps/Blend Add Normal Maps
- Normal Maps/Blend Mix Normal Maps
- Normal Maps/Blend Mix Reoriented Normal Maps
- Lighten/Blend Lighten
- Lighten/Blend Screen
- Lighten/Blend Add
- Lighten/Blend Color Dodge
- Darken/Blend Color Burn
- Darken/Blend Subtract
- Darken/Blend Darken
- Darken/Blend Multiply
- Burn/Blend Burn Shadows
- Burn/Blend Burn Highlights
- Burn/Blend Burn Midrange
- Dodge/Blend Dodge Highlights
- Dodge/Blend Dodge Shadows
- Dodge/Blend Dodge Midrange
- Vectors/Blend Paint Flow Vectors
- Vectors/Blend Nudge Normal Vectors
- Vectors/Blend Paint Normal Vectors
- Vectors/Blend Scale Vectors
- Vectors/Blend Nudge Flow Vectors
- Inversion/Blend Difference
- Inversion/Blend Inverse Difference
- Inversion/Blend Invert
- Inversion/Blend Exclusion
- Copy/Blend Copy RGB
- Copy/Blend Copy
- Component/Blend Hue
- Component/Blend Color
- Component/Blend Luminance
- Component/Blend Saturation