|
Spotify by Jens Kafitz |
- Where to find it:
- Add Procedural Layer / Procedural / Extension Pack / MultiFractal /
 NodeGraph / Right Mouse Click / Add Nodes / Procedural / Extension Pack / MultiFractal /
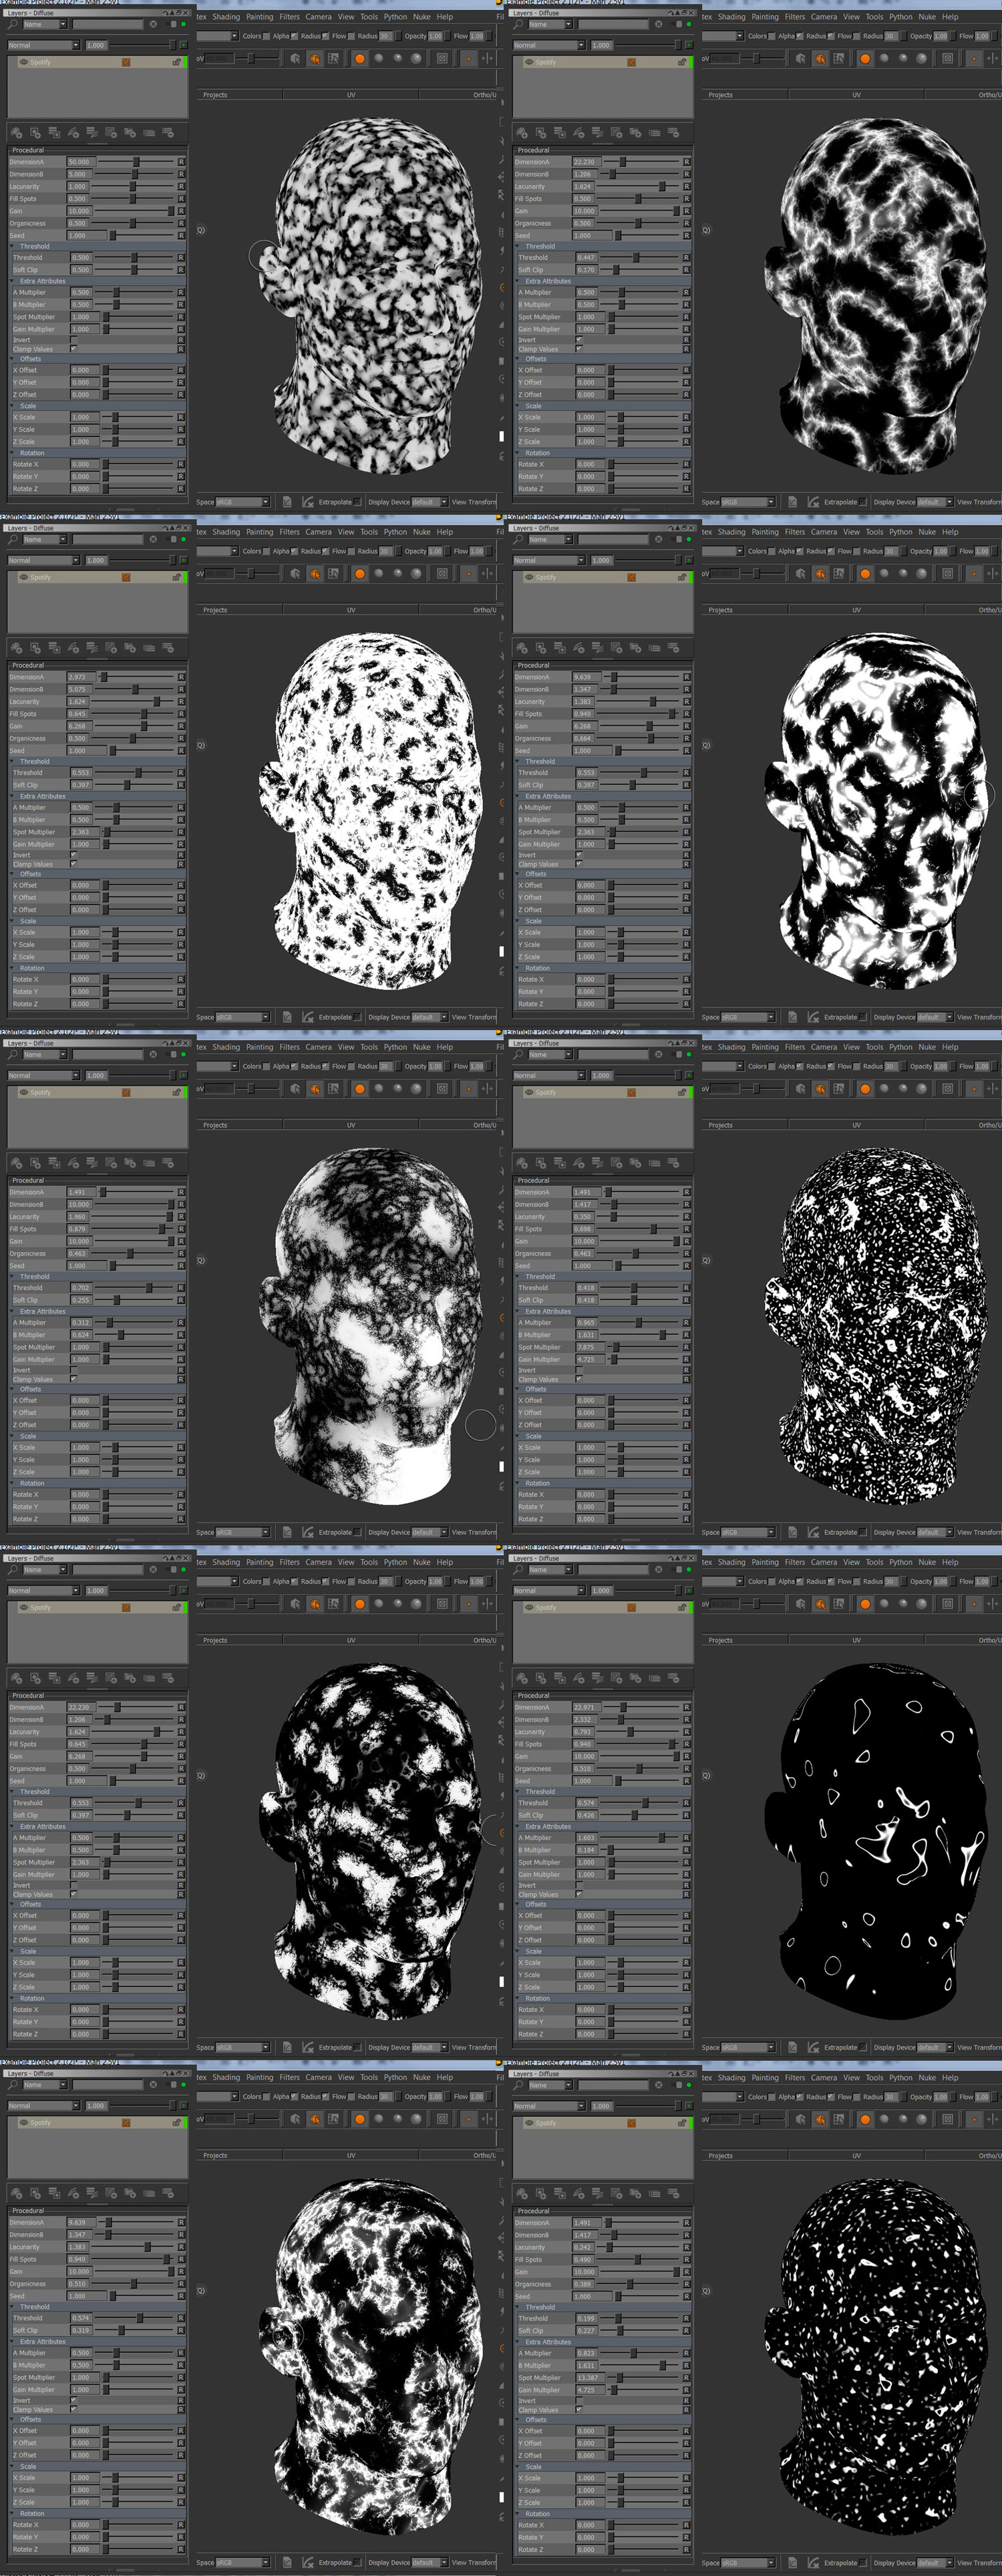
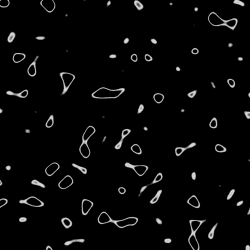
Spotify is a versatile MultiFractal for applications in terrain and weathering.
A simple stain mask created using one spotify node and one axis mask.
A full Spotify Feature presentation exists on vimeo:
Mari 2.x: Spotify Multi Fractal Node from Jens Kafitz on Vimeo.
Due to the expensive nature of the node, the node has been marked in red
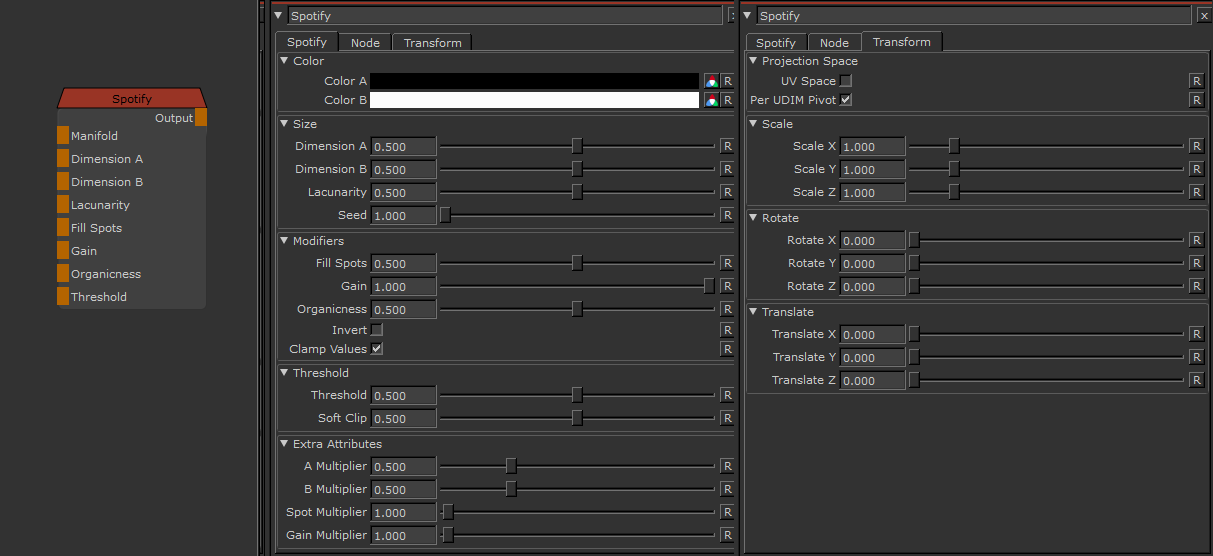
MAIN TAB
- Color A/B
The two colors that make up the final look of the procedural
|
|
Size controls Spotify currently does not have a a global size control to increase or decrease the size of features without changing the look |
Spotify is made up out of 2 different noises. DimensionA controls the frequency of the main noise
Spotify is made up out of 2 different noises. DimensionB controls the frequency of the secondary noise
- Lacunarity
Lacunarity will offset two noises against each other however in the case of Spotify it also affects the frequency.
This results in drastically different results depending if you have a low lacunarity (below 1.0) or a high lacunarity (above 1.0)
Increasing lacunarity from 0.0 to 2.0.
A look change happens at 1.0.
- Seed
A random start value for your fractal.
Changing the seed changes the overall look of your fractal while the general feature look stays the same, allowing for quick variation with a general look theme.
Fill Spots represents the exponent in an exponentiation with itself, widening (high values) or sharpening (low values) the created 'ridges' of the noise:
Increasing FillSpots from 0.01 to 1.0
The amount to multiply the noise's amplitude by for each octave
The amplitude is hardcoded for this noise to start at 1.0 for the first octave,
then gets multiplied by the Gain 1x time for each octave incrementing the value of the amplitude
Increasing Spotify Gain

- Organicness
In practical terms think of the Organicness as the size of the noises's spots.
While Gain will multiply for each octave representing the 'weight' of each octave for the final result,
Organicness represents a constant value that octave's result gets subtracted from.

|
Threshold |
- Threshold
Defines the Value at which point incoming colors/values go to black (incoming values to the left of the set slider value)
or white (incoming values to the right of the set slider value).
- Soft Clip
Used to visually soften the thresholding, it defines the Upper+Lower Bound of the Threshold
For example with a Threshold Value set to 0.5 and a Edge Value of 0.1, incoming values lower than 0.4
will be black and incoming values higher than 0.6 will be white. Between 0.4 and 0.6 will be a soft gradient.
|
Extra Attributes |
The following are multipliers against the corresponding sliders above to easily gain larger slider ranges.
|
|
Values outside the slider range As of Mari 2.6v3 you can enter numbers outside its range on any slider via the numerical field. |
- A Multiplier
Multiplier against the Dimension A Slider from the 'Size' Group.
- B Multiplier
Multiplier against the Dimension B Slider from the 'Size' Group.
- Spot Multiplier
Multiplier against the Fill Spots Slider from the 'Modifiers' Group.
- Gain Multiplier
Multiplier against the Gain Slider from the 'Modifiers' Group.
- Invert
Inverts the Noise result. Inversion is done before Color A and Color B are applied.
- Clamp Values
It is possible for the Spotify Noise to output values above 1.0 - even with Values below 1.0 in Color A and Color B.
Clamping will clip any values to a range of 0.0 - 1.0 before ColorA, Color B are applied.
TRANSFORM TAB
- UV Space
By default this procedural is generated in 3D World Space. This results in a seamless noise across UV seams.
By turning on UV Space the procedural is generated based on your UVs, resulting in seams between UV tiles/UDIM & uv shells.
Utilizing Transform Controls such as Scale (see below) you can apply a non-uniform transform to the procedural
to make use of specific UV layouts
- Per UDIM Pivot
Affects the transformation pivot for UV Transforms when in UV Space
With PerUDIMPivot on all transformation will be performed with a pivot at the centre of each UDIM.
With PerUDIMPivot off, transformations for all UDIMs share one common pivot at the base of UDIM 1001.
This will ensure seamless textures across UDIMs when your UV Shell is scaled up and covering multiple UDIMs.
without a cut inbetween.
UV Transformations applied to multiple UDIMs with perUDIM Pivot On (left) and off (right).

- Scale X / Y / Z
Will apply a scale along X,Y or Z to your noise. This is useful for creating patterns like woodgrain, drips etc.
When UV Space is turned on Scale Z is ignored.
- Rotate X / Y / Z
Will apply a rotation in X,Y or Z to your noise. When UV Space is turned on Rotate X & Rotate Y are ignored
and rotation is done around the center of each UV Tile/UDIM using Rotate Z.
- Translate X / Y / Z
Will apply an offset in X,Y or Z to your noise. When UV Space is turned on Translate Z is ignored.