Material Regions - Managing Complexity by Jens Kafitz |
Material Regions allow you to easily add visual complexity to your objects while keeping material attributes correct & in sync.
But depending on the required complexity you might hit the limits of interactive painting at one point or even the limit of your GPU
resulting in a 'Shader Error' Screen.
A Mari Shader Error Viewport Screen, which might
indicate that your Network is complexer than your GPU can handle

This chapter tries to outline different approaches to managing the material regions in a way that allows for interactive painting
even past your systems available resources.
Material Region chains work by layering all materials on top of each other by individual masks.
In reality that means that each material exists - either visible or not - on your entire object.
However not all parts of your object might require the ability to expose any material in a chain.
Let's look at an example:
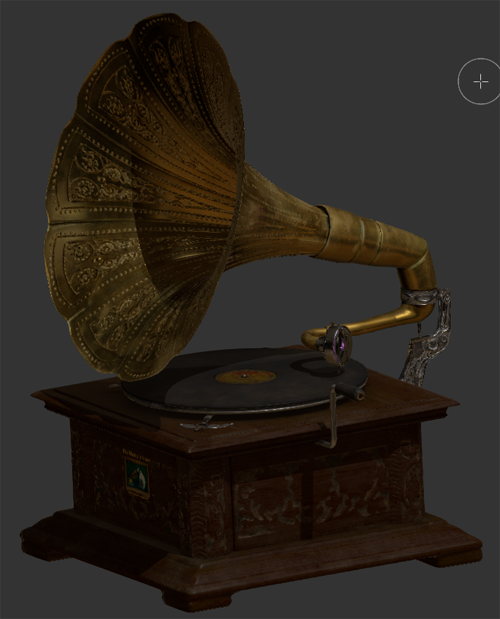
We can immediately identify at least 4 different materials that do not need to interact with each other:
Brass, Wood, Silver/Chrome & Vinyl.
Dirt types such as Dust on the other hand need to be able to be applied to all materials.
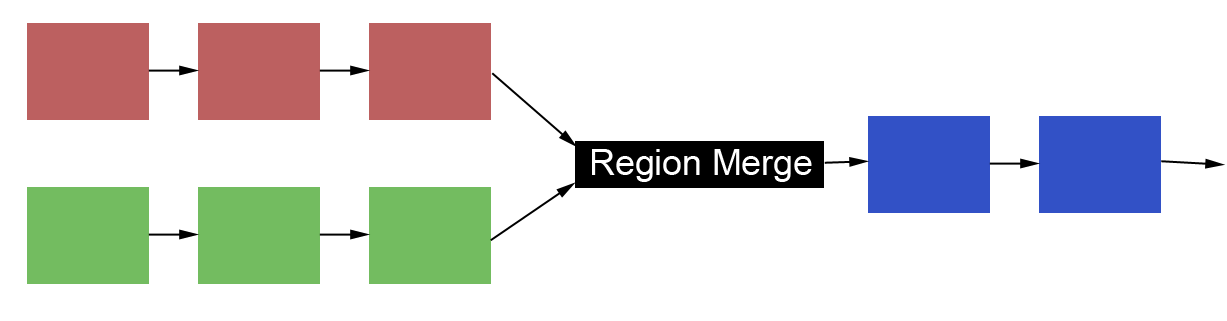
Subsequently we can treat the main materials in different region chains and then use Region Merge Nodes
to layer the different chains together, then applying Dust & Dirt Regions to the combined result:
You can then use a Region Output Node plugged into a shader and attach it to any of the main material branches to only
work on parts of the object, without having to evaluate other parts of the model:

If GPU Memory or maximum number of instructions your Video Card can perform is a bottleneck on your System caching of nodes will help alleviate it.
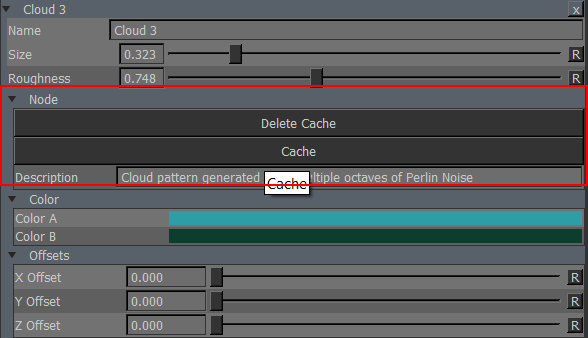
Nodes can be cached by going to the Node Properties and opening the 'Node' Attribute Group and pressing 'Cache'.
The current Node and all nodes feeding into the Node will be cached.
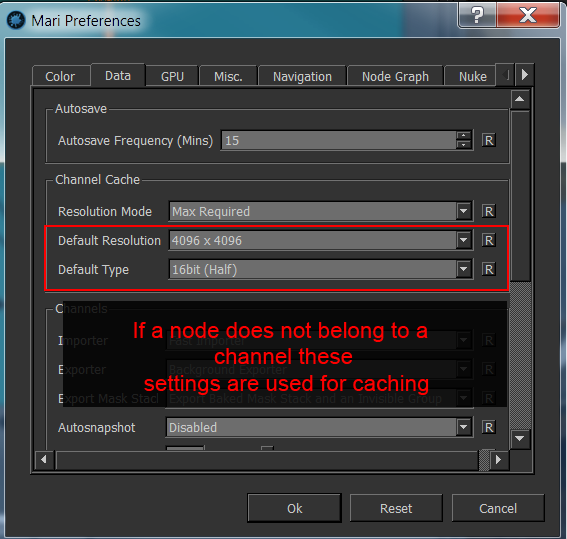
If a node is not directly associated to a channel Mari will use the default cache settings found under PREFERENCES / DATA / CHANNEL CACHE.
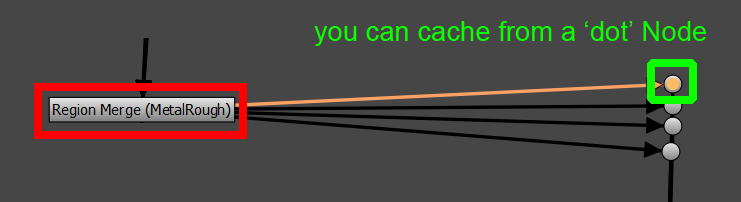
An alternative approach is to attach 'dot' nodes to each output of a Material Region and Cache from there (requires Mari 3.0v2 or higher).
This approach has the benefit that you can cache and uncache specific outputs based on the Data Mapping of
each Material Region.
A live representation of combined Region Height/Bump or Normal effects in a shader is the most expensive operation for Mari.
If you are happy with the overall height or normal map that a region chain gives you it can speed calculation up a lot to bake
the 'Height' or 'Normal' Output of the Region Output into a Paintable Node that is then attached to the Shader
and only return to the live Height/Normal Output of the Regions when changes are required.
On complex Region chains it can help to insert 'Bake Points' such as the ones shown below:
The purpose of this is to be able to temporary bake the output a region chain at one point into a texture without
loosing the input and flexibility that the region chain gives you.
|
FASTER CHANNEL EXPORT Creating 'Bake Points' is a good practice to reduce the Baking Time for Final Texture Output as well. By effectively 'locking' down a part of a region chain and creating texture maps for it Mari does not need to evaluate the ''locked' Region Chain when Baking the entire channel(s) for export. |
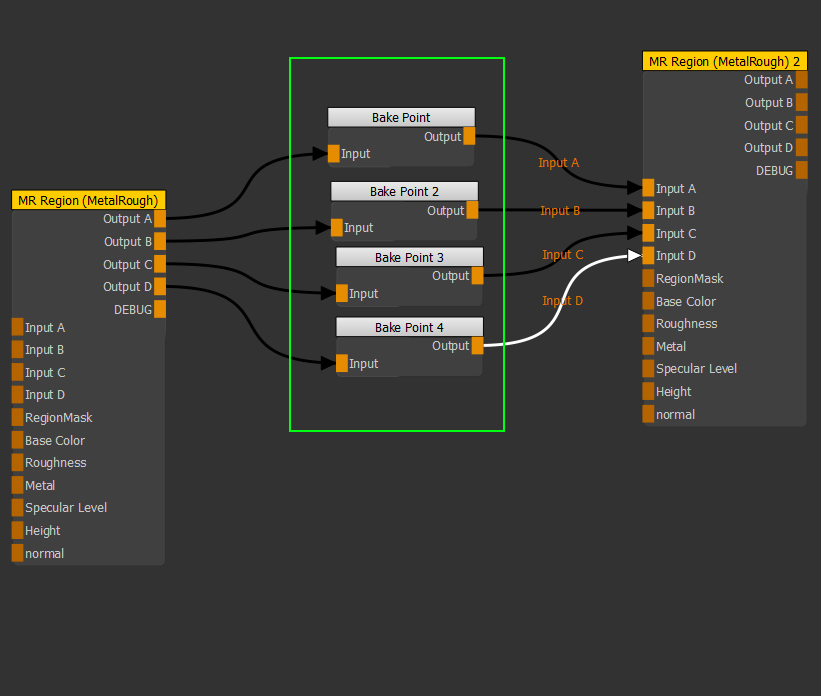
A 'Bake Point' utilizes a standard Mari Node (introduced in Mari 3.2)
![]()
1) Create one BakePoint Node per connection between two material regions ('Input A' , 'Input B' etc.)
2) Attach each Output of one Region to the Input of one Bake Point
3) Attach each Output of a Bake Point to the corresponding Input of the next Material Region
4) Open the Node Properties of each Bake Point and click the 'Bake' Button
5) Alternatively select each Bake Point, and open the right mouse click menu and choose
Edit / Bake Points / Bake Empty and Update Out-of-Date Bake Points
![]()
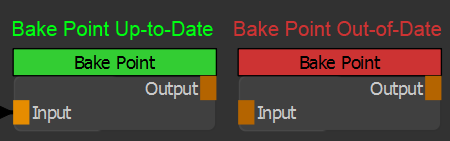
5) The Bake Points will be processed and will turn green indicating that their content is up-to-date with any information
feeding into them. If you make a change in the nodes feeding into the Bake Points the Bake Points will turn red,
indicating that their content is no longer representative of your input Nodegraph and that they need to be rebaked
You have now effectively inserted a computational stopgap into the region chain. The Regions to the left
of the BakePoint Node will no longer be evaluated
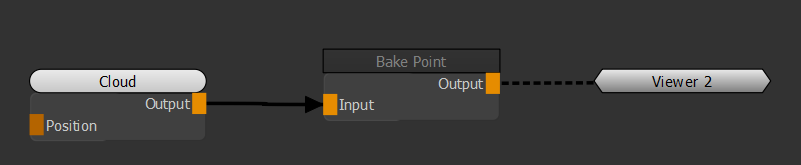
If you wish to return to the live view of the region simply select the BakePoint Nodes and press CTRL+D
or in the Bake Point Node Properties uncheck the 'use baked' checkbox.
Even though the viewer is attached to the Bake Point Node we are viewing the live Output of the Cloud
since the Bake Point is disabled
Created with the Personal Edition of HelpNDoc: Easy EBook and documentation generator