Ridged Multi Noise by Miguel A Santiago Jr |
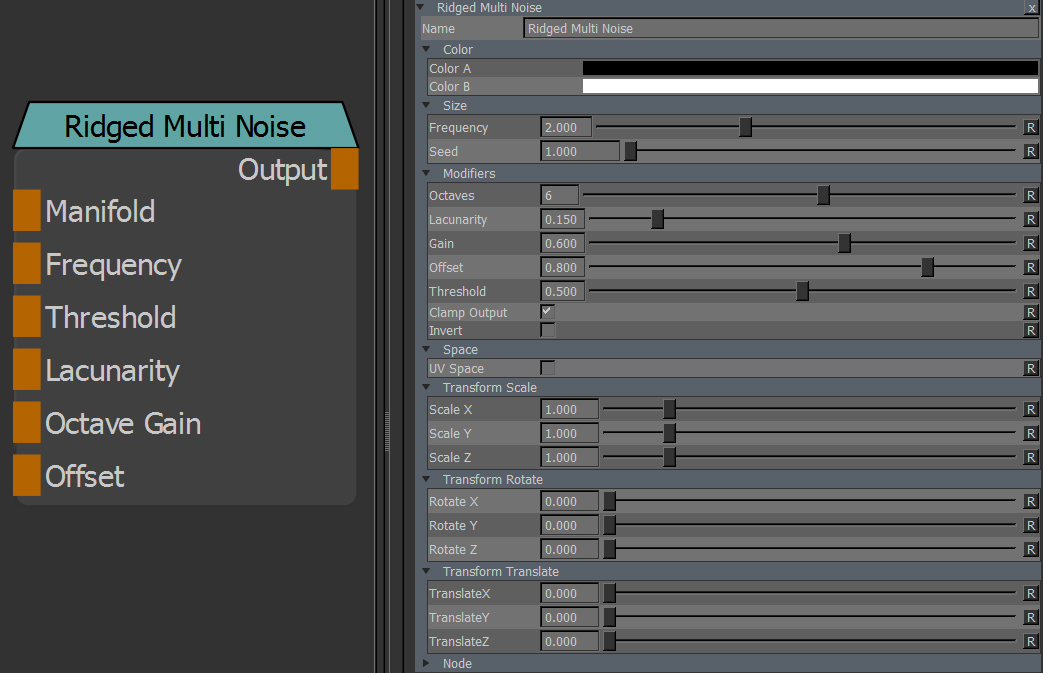
The two colors that make up the final look of the procedural
Size of fractal features on your model
A random start value for your fractal.
Changing the seed changes the overall look of your fractal while the general feature look stays the same,
allowing for quick variation with a general look theme.
|
Understanding Noise terminology For some background information on the terms below please refer to Understanding some basic noise terms |
Describes the level of detail of the noise. Detail is created by encapsulating the modifiers below into a loop and
running it multiple times incrementing the values from loop to loop.
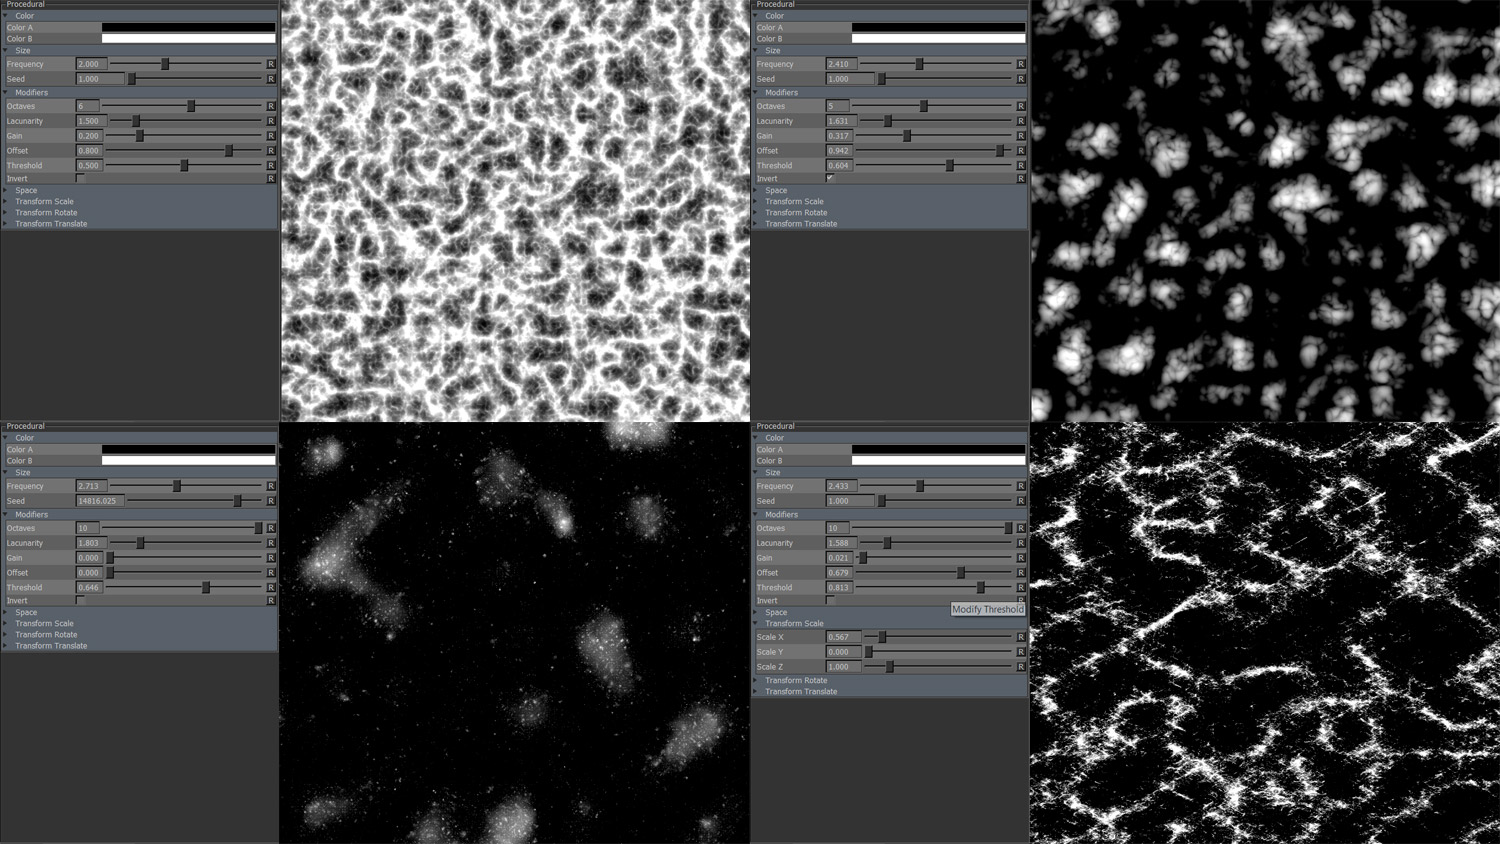
Modifying Octave Count on Ridged Multi Noise

Controls the size of the secondary fine details.
Changing Lacunarity on Ridged Multi Noise
The amount to multiply the noise's amplitude by for each octave
The amplitude is hardcoded for this noise to start at 1.0 for the first octave,
then gets multiplied by the Gain 1x time for each octave incrementing the value of the amplitude
Changing Gain on Ridged Multi Noise
Acts as a minuend in the creation of the ridge features. The absolute (no decimals) value of the ridges is subtracted from this Offset Value.
In practice it shifts the value of the ridges.
Changing Offset on Ridged Multi Noise
Defines the Value at which point the noise will be tipped towards color A (values to the left of the set slider value)
or color B (values to the right of the set slider value).
Clamps the noise calculation to a 0-1 range.
Color A/B are applied after the Clamping, so you can still set values above 1 if you choose to
however by clamping the Noise calculation the color mixing between the two colors works more
reliably. In general this should be left on.
Inverts the result of the noise. Inversion is done before color A and B are applied.
By default this procedural is generated in 3D World Space. This results in a seamless noise across UV seams.
By turning on UV Space the procedural is generated based on your UVs, resulting in seams between UV tiles/UDIM & uv shells.
Utilizing Transform Controls such as Scale (see below) you can apply a non-uniform transform to the procedural
to make use of specific UV layouts
Affects the transformation pivot for UV Transforms when in UV Space
With PerUDIMPivot on all transformation will be performed with a pivot at the centre of each UDIM.
With PerUDIMPivot off, transformations for all UDIMs share one common pivot at the base of UDIM 1001.
This will ensure seamless textures across UDIMs when your UV Shell is scaled up and covering multiple UDIMs.
without a cut inbetween.
UV Transformations applied to multiple UDIMs with perUDIM Pivot On (left) and off (right).

Will apply a scale along X,Y or Z to your noise. This is useful for creating patterns like woodgrain, drips etc.
When UV Space is turned on Scale Z is ignored.
Will apply a rotation in X,Y or Z to your noise. When UV Space is turned on Rotate X & Rotate Y are ignored
and rotation is done around the center of each UV Tile/UDIM using Rotate Z.
Will apply an offset in X,Y or Z to your noise. When UV Space is turned on Translate Z is ignored.
Created with the Personal Edition of HelpNDoc: Produce Kindle eBooks easily